Have you ever found yourself in a situation where your laptop’s mouse pad suddenly stops responding? It’s possible that laptop mouse pad that works today will not work tomorrow. It’s a frustrating experience, especially when one doesn’t have alternative option like external mouse. But fear not, the team of laptopjoint.com is here to help you solve such problem whenever it occurs.
Are you aware that one can mistakenly lock his or her laptop mouse pad without knowing by combining one or two keys. For example, pressing Fn+F6 or F6 depending on the laptop can malfunction a mouse pad completely. This article will guide you on the causes and solution to laptop mouse pad not working.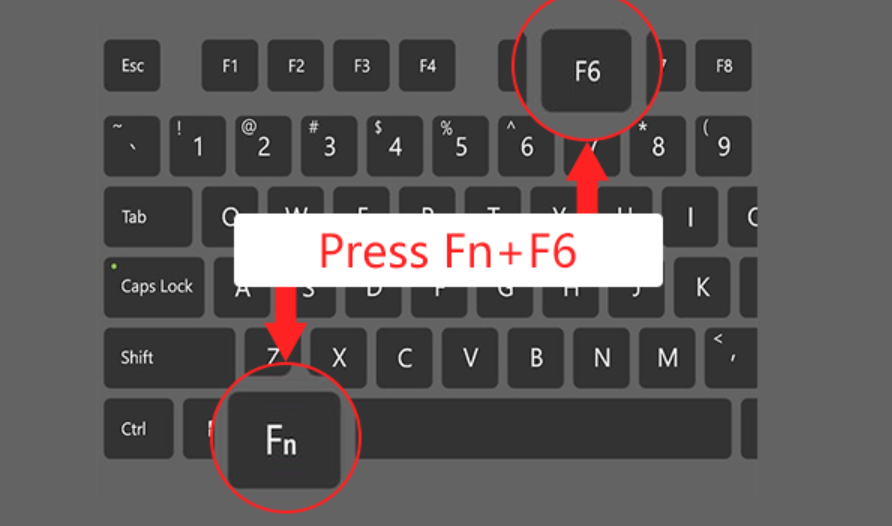
What Causes Laptop Mouse Pad to Stop Working?
There are many factors can cause a laptop touchpad to stop working. Here are some common causes:
Driver Issues
Whenever a mouse pad drive is out of date, corrupted, or incompatible touchpad drivers can prevent the touchpad from functioning correctly. Updating or reinstalling the compatible drivers may resolve the issue.
Hardware Problems
Hardware problem could be a physical damage, loose connections due to liquid spilled on it or flex detachment. it can as well be a component failures such as bad or bunt controllers within the touchpad hardware can lead to malfunction. In such cases, professional repair or replacement of any of the affected areas is needed.
Software Conflicts
Conflicts with other software or system settings can interfere with touchpad functionality. Adjusting settings or uninstalling conflicting software may help resolve the issue.
Touchpad Disablement
Many laptops have a function key or setting that allows users to disable the touchpad. Accidentally triggering this disablement can make the touchpad appear non-functional.
How to disable laptop mouse pad for windows and Mac
To disable the touchpad on your laptop, you can typically use one of the following methods:
1. Using Keyboard Shortcut
Many laptops have a function key combination that allows you to toggle the touchpad on and off. Look for a key labeled with an icon that resembles a touchpad or one with fingertip diagram or with the abbreviation “TP” or “TPAD.” Press the function key (often labeled “Fn”) along with the touchpad toggle key to disable or enable the touchpad.
2. Through System Settings (Windows)
To disable laptop mouse pad through Windows or system settings. Go to the Control Panel or Settings app, then select “Devices” or “Hardware and Sound,” depending on your version of Windows. Look for the touchpad settings and find an option to disable the touchpad.
Or click the windows start menu and type= touchpad setting. Click on the touchpad setting and you will see touchpad on and off. Note that the exact steps may vary slightly depending on your laptop model and Windows version.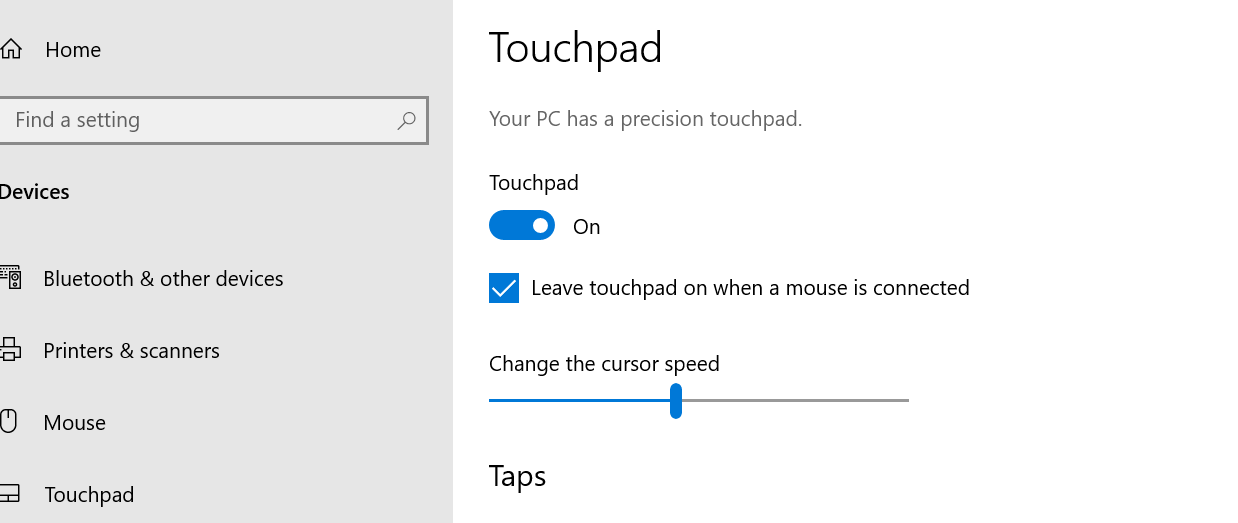
3. Through System Preferences (Mac operating system)
On Mac laptops, you can disable the touchpad through the System Preferences. Click on the Apple menu in the top-left corner, then select “System Preferences” > “Trackpad.” Look for an option to disable the touchpad or adjust sensitivity settings. You may also find options to disable the touchpad temporarily while using an external mouse.
4. Using Device Manager (Windows)
Another method to disable the touchpad on Windows laptops is through the Device Manager. Right-click on the Start button and select “Device Manager.” Expand the “Mice and other pointing devices” category, then right-click on the touchpad device and select “Disable device.”
5. Third-Party Software
There are also third-party software solutions available that allow you to disable the touchpad or customize its behavior. However, be cautious when downloading and installing third-party software to ensure it is reputable and safe to use.
Battery Issues
In some cases, power-related issues such as low battery levels or faulty power management settings or faulty charger (adapter) can affect touchpad operation. Ensuring adequate power source and adjusting power settings may help.
Environmental Factors
Dust, dirt, moisture, or other environmental contaminants can accumulate on the touchpad surface or within the laptop casing, leading to operational issues. Cleaning the touchpad and surrounding area may improve functionality.
Operating System related issues
Updates to the operating system or corrupted operating system may introduce mouse pad compatibility issues. That compatibility issues can affect touchpad operation. Rolling back updates or reinstalling the operating system may resolve the issue.
Solutions to bad laptop mouse pad or touchpad
Here are some solutions to try if your laptop mouse pad isn’t working:
Restart Your Laptop
If your laptop touchpad suddenly stopped working, the first aid treatment is to restart the laptop. Sometimes, a simple restart can resolve temporary glitches or software conflicts affecting the mouse pad. If it persists, then check the second option.
Check Touchpad Enablement
Ensure that the touchpad hasn’t been accidentally disabled or locked. Look for a function key or setting on your keyboard that toggles the touchpad on and off. Example, F6 or Fn
+F6 to enable and disable touchpad.
Update Touchpad Drivers
Install the latest touchpad driver because outdated or corrupted drivers can cause mouse pad issues. Visit the manufacturer’s website to download and install the latest drivers for your laptop’s touchpad.
Clean the Touchpad Surface
Dust, dirt, liquid and debris can accumulate on the touchpad, hindering its functionality. Use a soft, lint-free cloth to gently clean the surface. If it persists, look for a technician to change the mouse trackpad and that solves the problem.
Adjust Touchpad Settings
Explore your laptop’s settings menu for touchpad-related options. Sometimes, adjusting sensitivity settings or enabling additional features can resolve issues.
How to adjust laptop touchpad settings for windows
To adjust touchpad settings ow Windows 10, follow these steps:
1. Open Settings
Click on the Start menu, then select the gear icon to open the Settings app.
2. Go to Devices
In the Settings window, click on the “Devices” option.
3. Select Touchpad
In the left sidebar, select “Touchpad” to view the touchpad settings.
4. Adjust Settings
You’ll see various options to customize your touchpad experience.
Here are some common settings you can adjust:
1. Touchpad Sensitivity
You can adjust the sensitivity of the touchpad to control how light or firm your touch needs to be for it to respond.
2. Touchpad Gestures
Windows 10 supports various touchpad gestures, such as two-finger scrolling, pinch-to-zoom, and three-finger swiping. Toggle these gestures on or off according to your preference.
3. Touchpad Scrolling Direction
You can choose the scrolling direction of the touchpad. By default, scrolling down on the touchpad moves the page down, but you can reverse this if you prefer.
4. Touchpad Tapping
You can decide to enable or disable tapping on the touchpad to perform actions like clicking or highlighting.
5. Touchpad Palm Rejection
This feature helps prevent accidental touchpad input when you’re typing by ignoring touches from your palm.
6. Save Changes
Once you’ve adjusted the settings to your preference, close the Settings app. Your changes will be saved automatically.
How to Adjust Laptop Touchpad for Mac
simply adjust the touchpad settings on a Mac laptop, follow these steps:
1. Open System Preferences
Click on the Apple menu in the top-left corner of the screen, then select “System Preferences.”
2. Go to Trackpad Settings
In the System Preferences window, locate and click on the “Trackpad” icon.
3. Adjust Settings
You’ll see several tabs with various options to customize your touchpad experience.
Here are some common settings you can adjust:
1. Point & Click
Customize options related to clicking, tapping, and dragging on the touchpad.
2. Scroll & Zoom
Adjust settings for scrolling direction, zooming, and other gestures.
3. More Gestures
Enable or disable additional gestures such as swiping between pages, Mission Control, and App Exposé.
4. Accessibility
Explore accessibility options for the touchpad, such as enabling Tap to Click or adjusting the tracking speed.
5. Secondary Click
Customize how secondary clicks (right-clicks) are performed on the touchpad.
6. Touchpad Hand Rest
Enable or disable the feature that automatically ignores accidental touches while typing.
7. Customize Additional Settings
Depending on your MacBook model and macOS version, you may have additional settings available. Explore the options provided to tailor the touchpad settings to your liking.
8. Test Settings
After adjusting the settings, try out the touchpad to ensure the changes meet your preferences and needs.
9. Close System Preferences
Once you’re satisfied with the adjustments, close the System Preferences window. Your changes will be saved automatically.
Try External Mouse
External mouse could be a temporal solution to a faulty mouse pad, as it helps you to accomplish a certain task at that particular time. As a temporary workaround, you can use an external mouse plugged into your laptop’s USB port until you resolve the touchpad issue.
By properly following these solutions tips, you can troubleshoot and potentially fix problems with your laptop’s mouse pad, restoring its functionality for smooth navigation and control.
Conclusion:
In conclusion, dealing with a laptop mouse pad that’s not working can be annoying. But if you’re patient and keep trying different solutions, you’ll usually find a fix.
Start by checking settings, cleaning the touchpad, and updating drivers. If nothing works, don’t hesitate to ask for help or use an external mouse until you sort out the problem. With the right approach, you’ll soon have your laptop’s mouse pad working again, making navigation a breeze.